Publishing Humidity and Temperature sensor data to AWS-IoT using ESP8266
This article shows you how to publish humidity and temperature data to AWS IoT using Node MCU, DHT 11 Sensor and Arduino. Most of the solutions available on the Internet suggest using AWS IoT SDKs or flashing the Node MCU with Mongoose OS in order to connect the device to AWS IoT. Here I’ll show you how I managed to achieve the same using just arduino-esp8266fs-plugin and the code provided in the article.
AWS-IoT
First we have to register our device in the AWS-IoT registry. AWS provide a comprehensive step by step guide to do this. So I’ll just show you the steps I followed without going in to much details.
Create a Thing
- Choose Manage
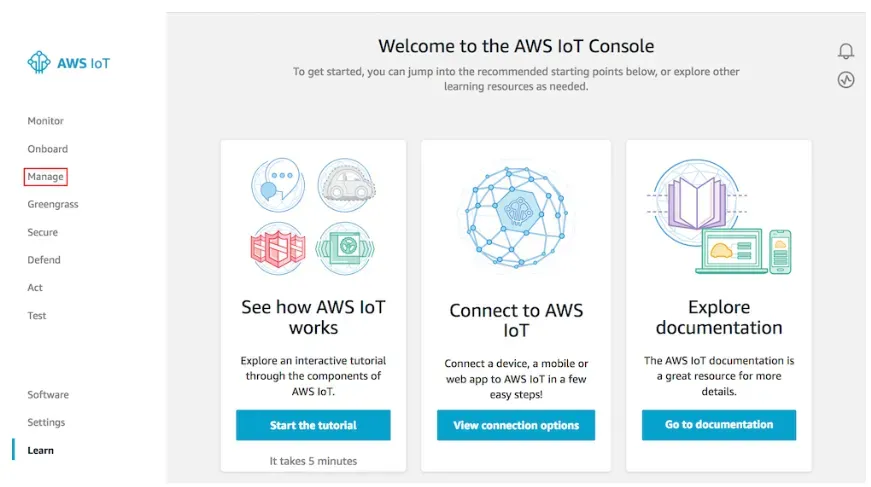
Source : AWS IoT Developers Guide
- Register a thing
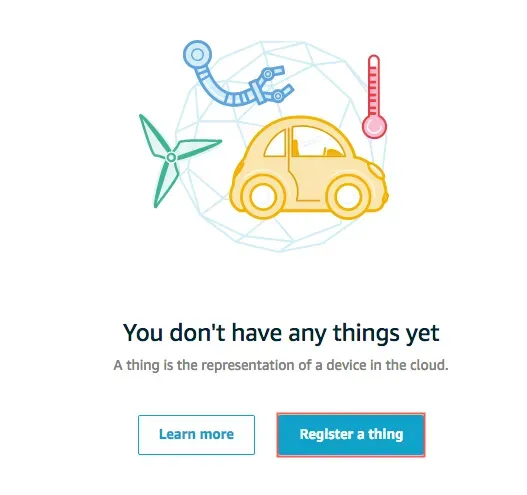
Source : AWS IoT Developers Guide
-
Create single thing
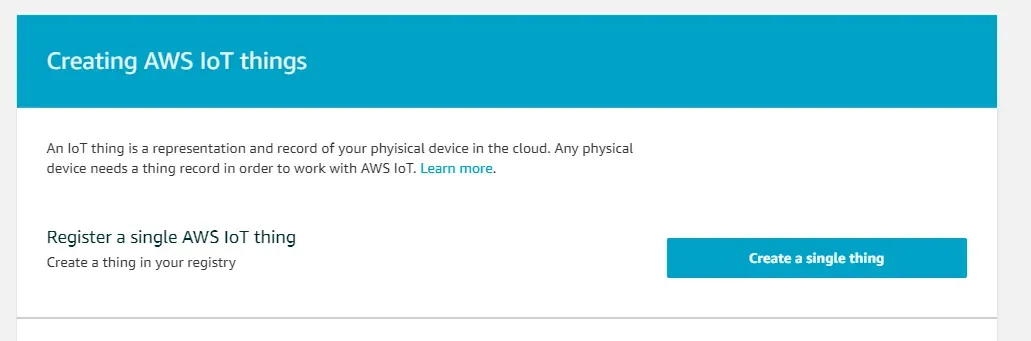
-
Name the thing and click “Next”
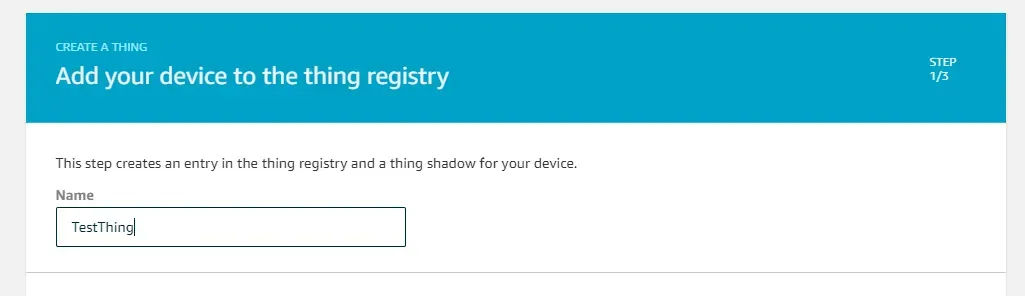
Add suitable name in the name field and click “Next”. No need to change other default options.
-
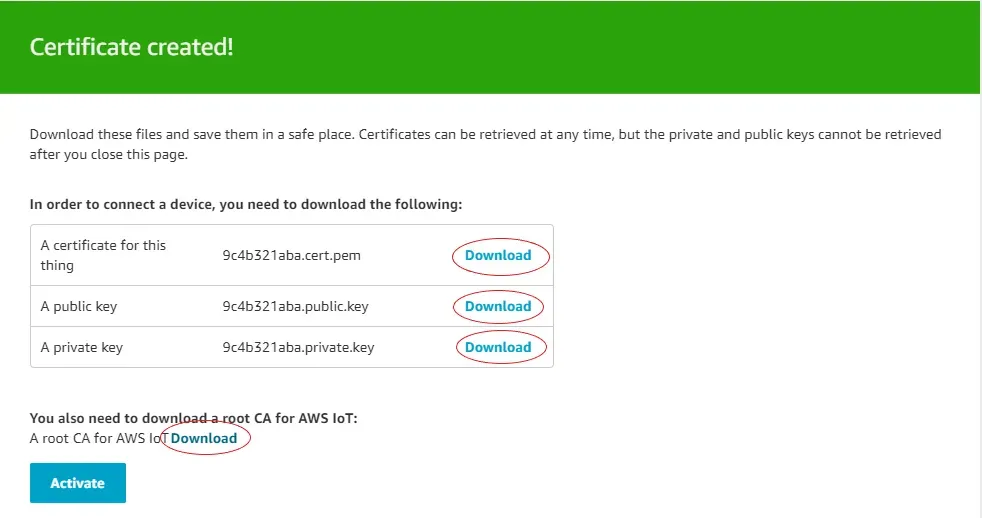
Add certificate for your thing

-
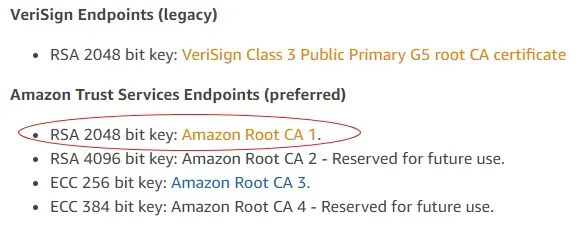
Download Certificates
-
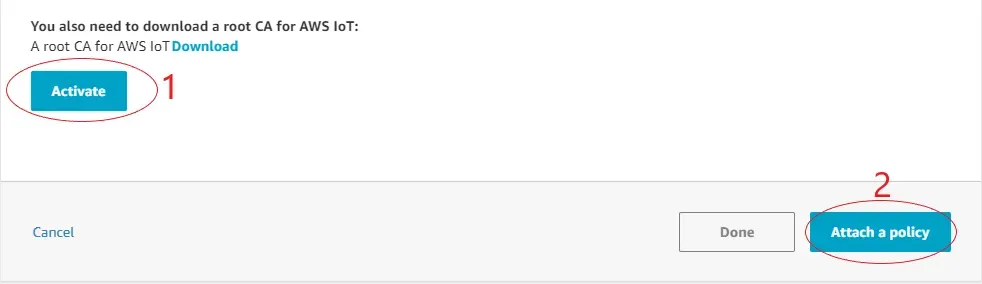
Activate certifactes and attach policy
-
Register your thing
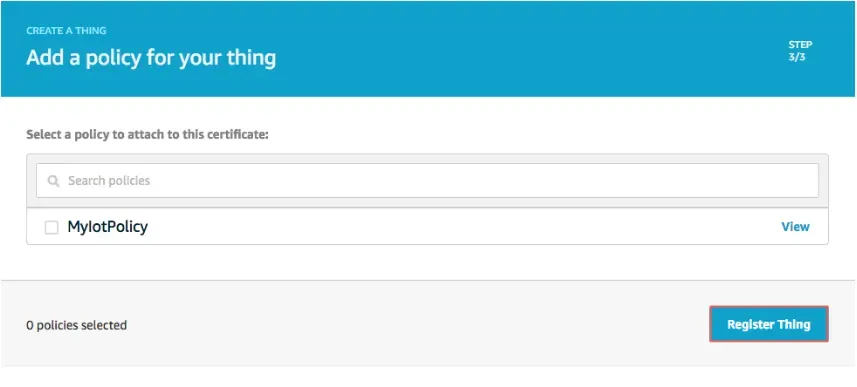
-
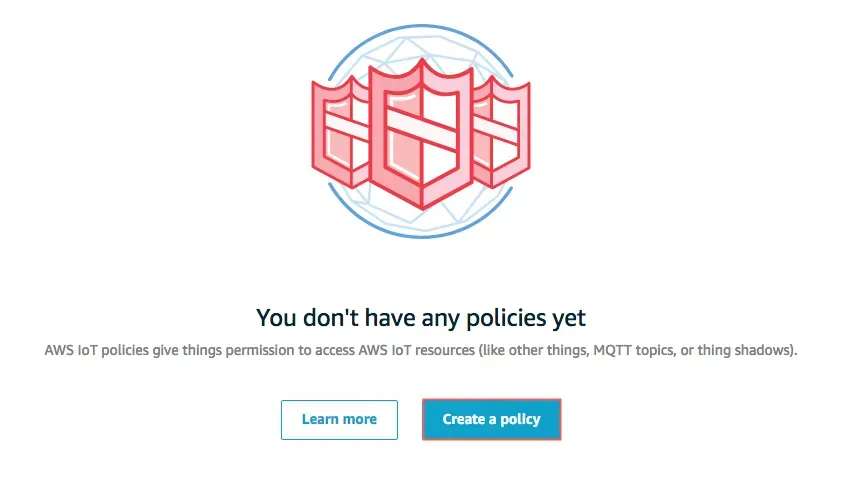
Create policy
Select Policy under Secure from navigation pane and choose Create
- Fill the Create a policy page as shown in the image below. You can name the policy as you wish
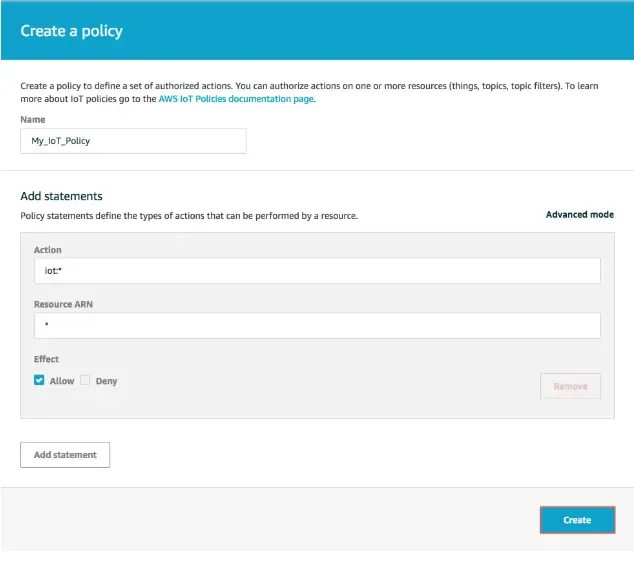
Source : AWS IoT Developers Guide
-
Choose Manage from Navigation and Choose your thing, Then choose Security.
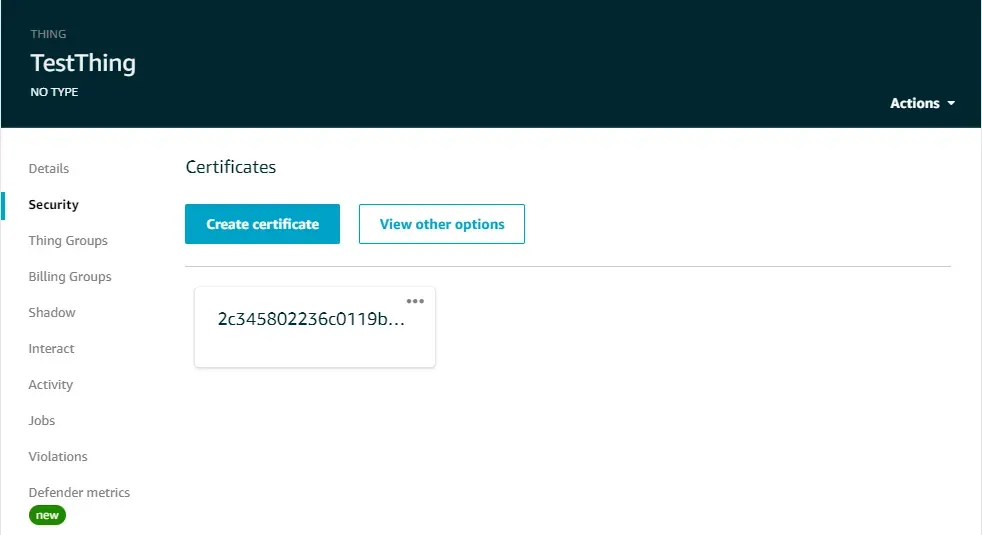
-
Select your certificate and choose Attach policy from Actions
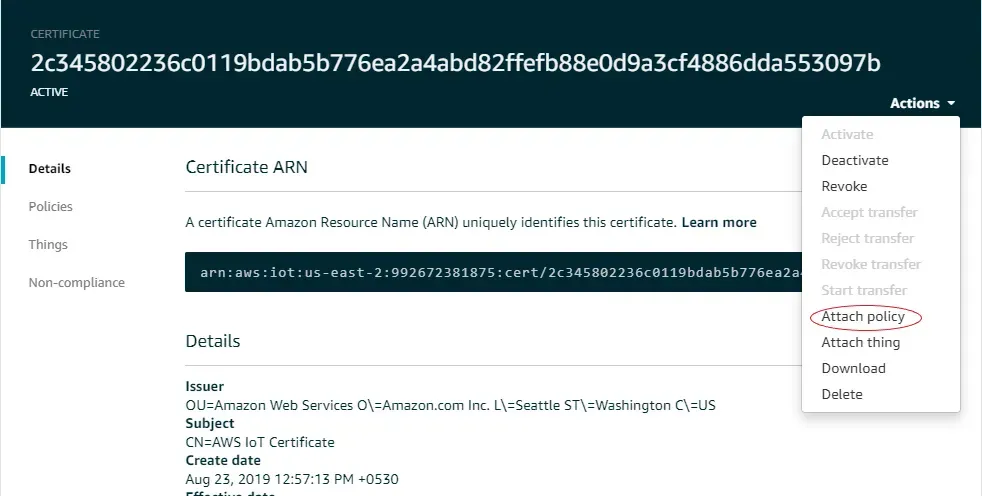
-
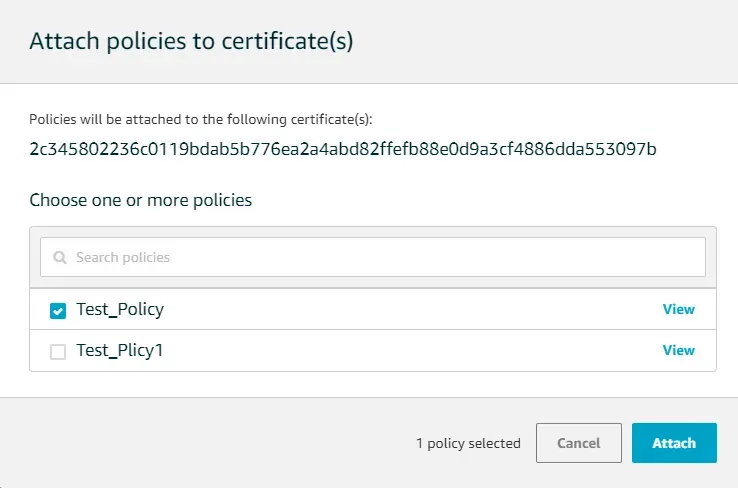
Select your policy and click “Attach”
Now our device is successfully registered in the AWS-IoT registry, So let’s take a look at the circuit diagram.
Circuit Diagram
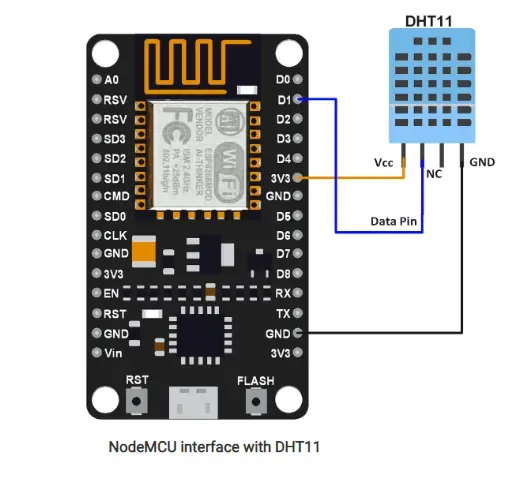
Source: www.electronicwings.com
Data pin of DHT 11 could be connected to any digital pin. For more technical details please follow this step by step guide. If you haven’t already setup Arduino IDE for Node MCU follow this guide to do the setup.
Certificates
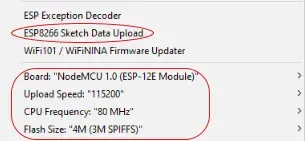
Before we start coding we need to upload our certificates to the Development board. Here we do not use our certificates in the code itself considering the security. First download the arduino-esp8266fs-plugin and follow the installation guide. Once plugin is successfully installed we can find following options in tools menu of Arduino IDE.
In order to upload the certificates we must convert them to .der format using OpenSSL. Follow this guide to download and install OpenSSL on windows. Then open command prompt and go to the location where your certificates are saved and type the following commands.

To upload the certificates follow the following steps
- Create a new sketch and save it
- Go to sketch directory (choose Sketch > Show Sketch Folder).
- Create folder named data and place the .der files inside the folder.
- Make sure you closed the serial monitor and choose the correct board and port.
- Choose tools> ESP8266 Sketch Data Upload to upload the files.
Code
Now let’s take a look at the code. Example code was taken from the Copercini’s GitHub repository and modifications were done according to the requirement.
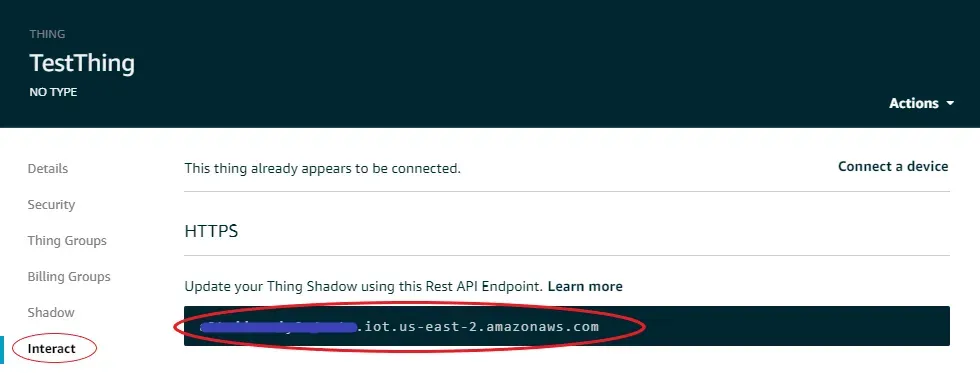
To get the AWS_endpoint, from AWS IoT navigation pane choose Manage, choose your thing. Inside your thing choose interact. Select the circled endpoint as the AWS_endpoint.
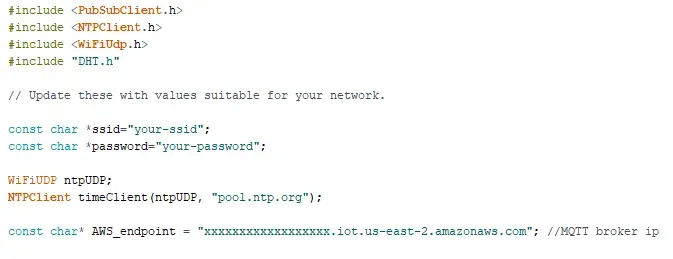
Complete code is given below
/*
   Public Domain - 2019
   This example needs https://github.com/esp8266/arduino-esp8266fs-plugin
   Based on ESP8266 AWS IoT example by Evandro Luis Copercini
   It connects to AWS IoT server then:
  - publishes humidity and temperature reading to the topic "outTopic" every two seconds

*/

#include "FS.h"
#include <ESP8266WiFi.h>
#include <PubSubClient.h>
#include <NTPClient.h>
#include <WiFiUdp.h>
#include "DHT.h"

// Update these with values suitable for your network.

const char *ssid="your-ssid";
const char *password="your-password";

WiFiUDP ntpUDP;
NTPClient timeClient(ntpUDP, "pool.ntp.org");

const char* AWS_endpoint = "xxxxxxxxxxxxxxxxxx.iot.us-east-2.amazonaws.com"; //MQTT broker ip


void callback(char* topic, byte* payload, unsigned int length) {
  Serial.print("Message arrived [");
  Serial.print(topic);
  Serial.print("] ");
  for (int i = 0; i < length; i++) {
    Serial.print((char)payload[i]);
  }
  Serial.println();

}

WiFiClientSecure espClient;
PubSubClient client(AWS_endpoint, 8883, callback, espClient); //set  MQTT port number to 8883 as per //standard
long lastMsg = 0;
char msg[50];
int value = 0;

#define DHTTYPE DHT11   // DHT 11
#define dht_dpin D6     // Signal pin of DHT 11 is connected to the Digital pin 6

DHT dht(dht_dpin, DHTTYPE);

void setup_wifi() {

  delay(10);
  // We start by connecting to a WiFi network

  espClient.setBufferSizes(512, 512);
  Serial.println();
  Serial.print("Connecting to ");
  Serial.println(ssid);

  WiFi.begin(ssid, password);

  while (WiFi.status() != WL_CONNECTED) {
    delay(500);
    Serial.print(".");
  }

  Serial.println("");
  Serial.println("WiFi connected");
  Serial.println("IP address: ");
  Serial.println(WiFi.localIP());

  timeClient.begin();

  while(!timeClient.update()){
    timeClient.forceUpdate();
  }

  espClient.setX509Time(timeClient.getEpochTime());

}


void reconnect() {
  // Loop until we're reconnected
  while (!client.connected()) {
    Serial.print("Attempting MQTT connection...");
    // Attempt to connect
    if (client.connect("TestThing")) {
      Serial.println("connected");
      // Once connected, publish an announcement...
      //client.publish("outTopic","hello");
      // ... and resubscribe
      client.subscribe("inTopic");
    } else {
      Serial.print("failed, rc=");
      Serial.print(client.state());
      Serial.println(" try again in 5 seconds");

      char buf[256];
      espClient.getLastSSLError(buf,256);
      Serial.print("WiFiClientSecure SSL error: ");
      Serial.println(buf);

      // Wait 5 seconds before retrying
      delay(5000);
    }
  }
}


void setup() {

  Serial.begin(115200);
  Serial.setDebugOutput(true);

  dht.begin();

  setup_wifi();
  delay(1000);

  if (!SPIFFS.begin()) {
    Serial.println("Failed to mount file system");
    return;
  }

  Serial.print("Heap: "); Serial.println(ESP.getFreeHeap());

  // Load certificate file
  File cert = SPIFFS.open("/cert.der", "r"); //replace cert.crt with your uploaded file name
  if (!cert) {
    Serial.println("Failed to open cert file");
  }
  else
    Serial.println("Success to open cert file");

  delay(1000);

  if (espClient.loadCertificate(cert))
    Serial.println("cert loaded");
  else
    Serial.println("cert not loaded");


  // Load private key file
  File private_key = SPIFFS.open("/key.der", "r"); //replace private with your uploaded file name
  if (!private_key) {
    Serial.println("Failed to open private cert file");
  }
  else
    Serial.println("Success to open private cert file");

  delay(1000);

  if (espClient.loadPrivateKey(private_key))
    Serial.println("private key loaded");
  else
    Serial.println("private key not loaded");


   // Load CA file
  File ca = SPIFFS.open("/ca.der", "r"); //replace ca eith your uploaded file name
  if (!ca) {
    Serial.println("Failed to open ca ");
  }
  else
    Serial.println("Success to open ca");

    delay(1000);

    if(espClient.loadCACert(ca))
      Serial.println("ca loaded");
    else
      Serial.println("ca failed");
      Serial.print("Heap: "); Serial.println(ESP.getFreeHeap());
  }


void loop() {

  if (!client.connected()) {
    reconnect();
  }
  client.loop();

  long now = millis();
  if (now - lastMsg > 2000) {
    lastMsg = now;

    float h = dht.readHumidity();      // Get humidity reading
    float t = dht.readTemperature();   // Get temperature reading

    // Check if any reads failed and exit early (to try again).
    if (isnan(h) || isnan(t)) {
      Serial.println("Failed to read from DHT sensor!");
      return;
    }

    String temp = "{\"temperature\":" + String(t) + ", \"humidity\":" + String(h) + "}";
    int len = temp.length();
    char msg[len+1];
    temp.toCharArray(msg, len+1);


    Serial.print("Publish message: ");
    Serial.println(msg);
    client.publish("outTopic", msg);
    Serial.print("Heap: "); Serial.println(ESP.getFreeHeap()); //Low heap can cause problems
  }
}
Upload the code to the board and your sensor should publish data to the AWS.
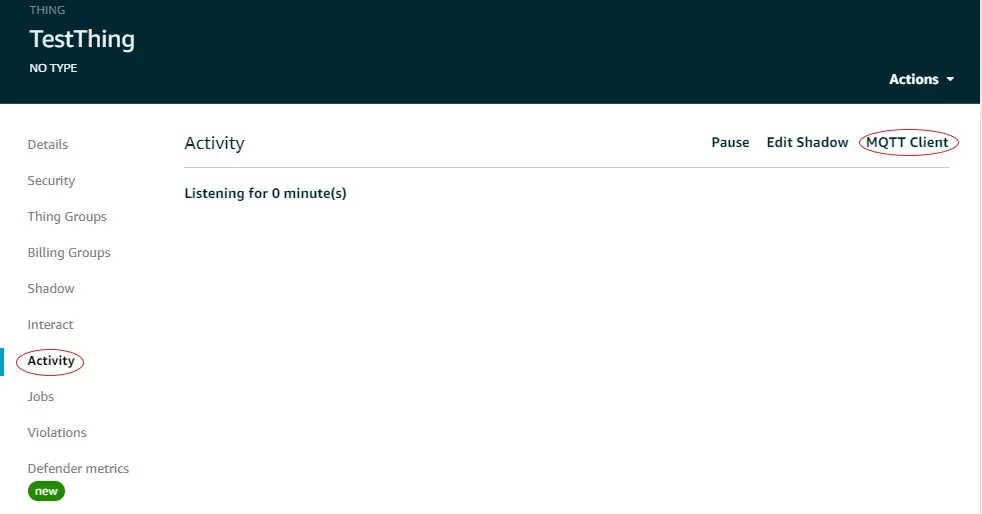
Now to view that data in AWS, Select your thing and choose Activity, choose MQTT Client.
In MQTT client page give subscription topic name as given in the code and Subscribe.
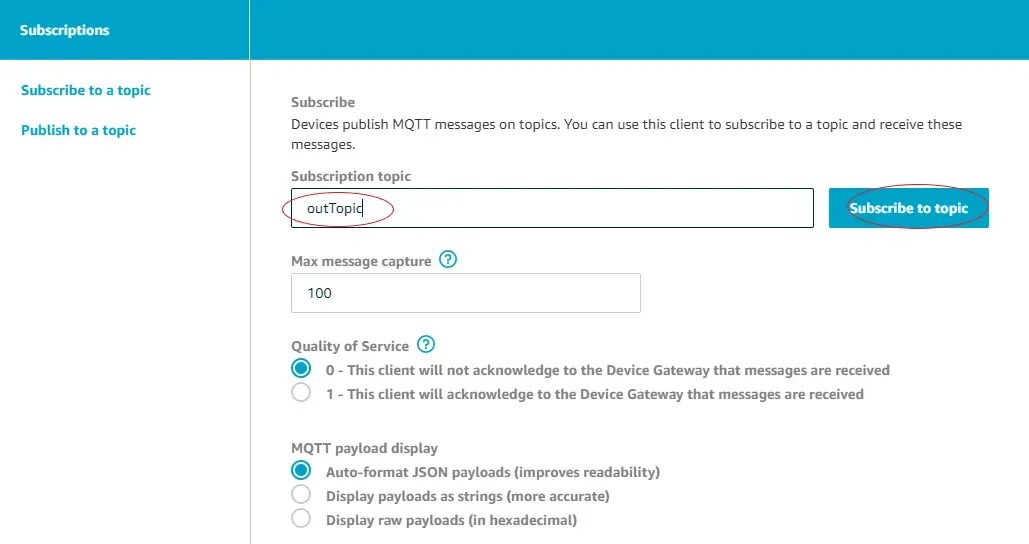
That’s it now you can view the data published from the sensor. I hope this article was clear and useful. Try this out and please feel free to response if you ran into any problem or to give your suggestions. In a future article let’s discuss how to display published data on Angular front end.